Tuesday, December 31, 2013

Annual Christmas Towels


Every year my girls and daughters-in-law get kitchen towels from me for Christmas.

This year, I got an early start when I came home from vacation in April with a big cone of 8/2 cotton yarn in a teal color.  I decided on a monk's belt pattern from Handwoven Design Collection #18.  I wound the warp for six towels and started the threading in June.  It was a good thing I got an early start, because I was diagnosed with ovarian cancer early in July and had major surgery a week later.  While recovering from surgery, I sat for many days looking at the loom that was partially threaded.  As I started feeling a bit better and became bored doing nothing, I decided to see if I could finish the threading.

Working a few minutes at a time, I got it ready for the first towel.  Now, all I needed were yarn color choices from the girls.  Three of them were here a week later to check up on me and to come for the Charlevoix Venetian Festival.  They picked their colors and I was able to start.
Carolyn's towel was first.  The colors she chose were light orange, red, green and yellow. The yarns used were 8/2 cotton.

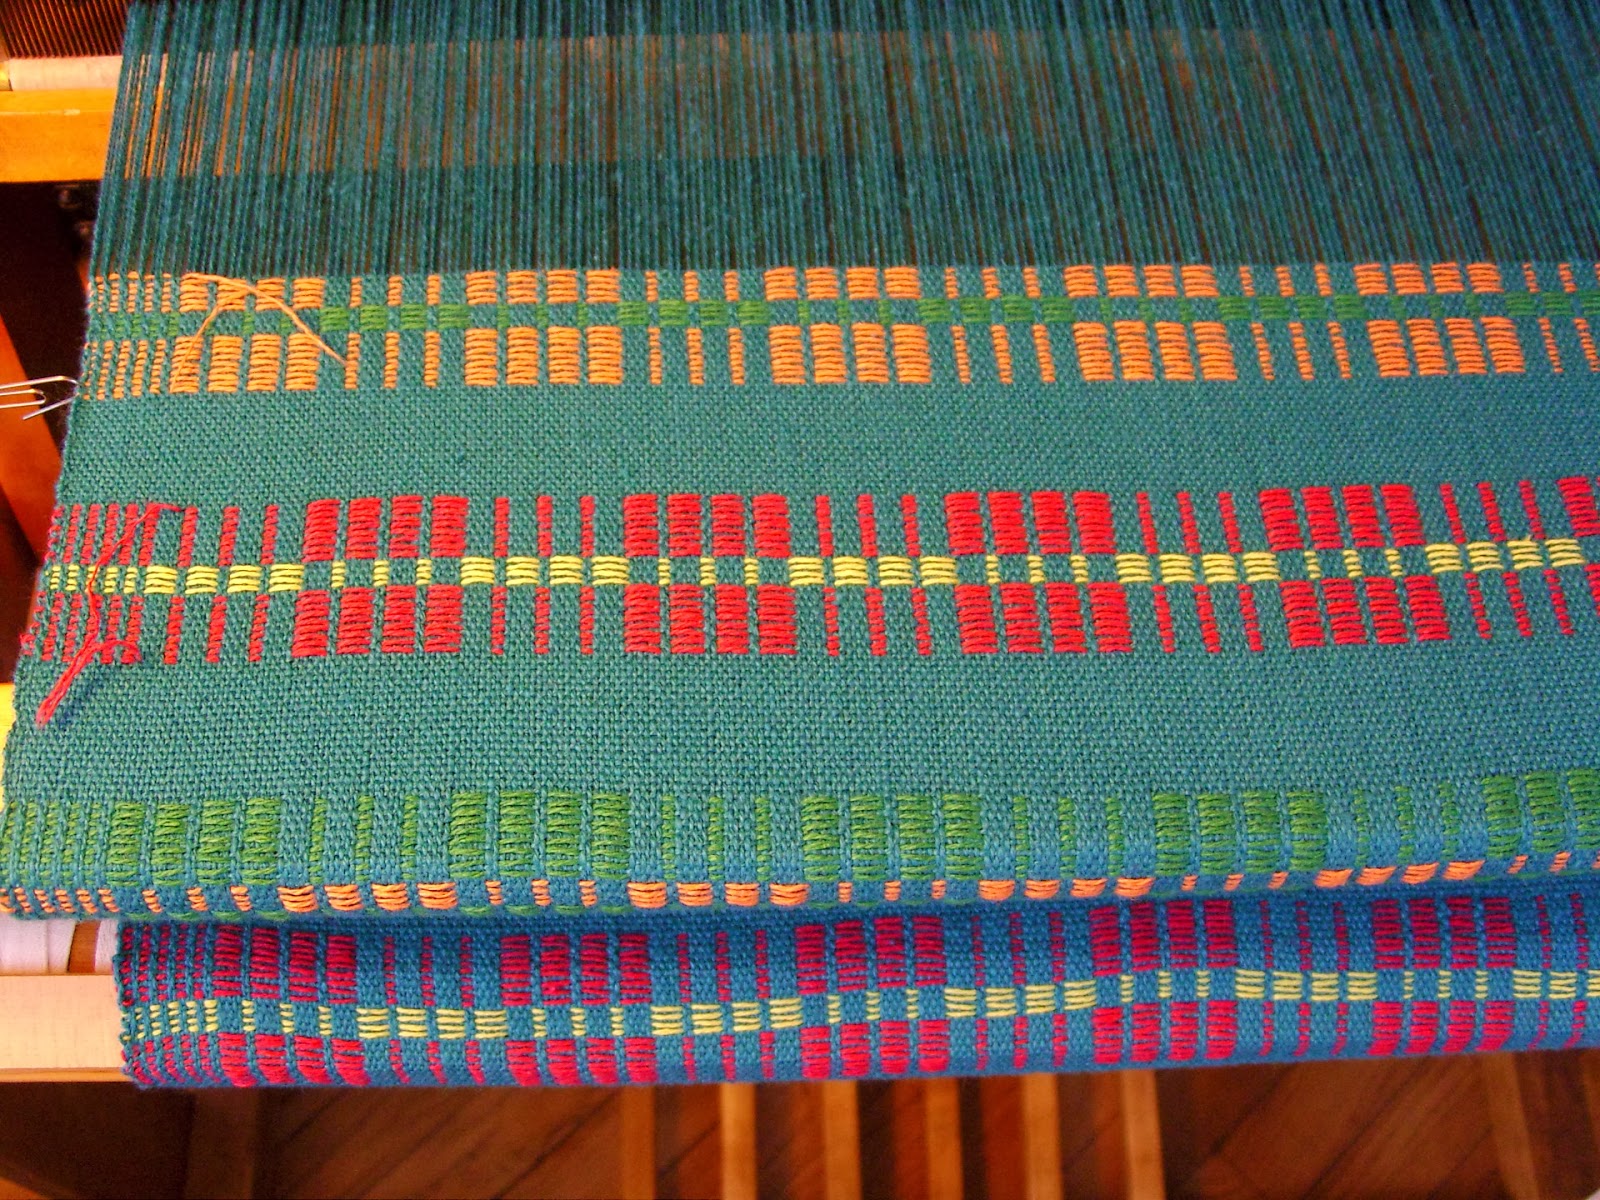
After weaving this one with a single strand of yarn for the pattern, I decided the rest of the towels needed the pattern yarn to be doubled.  Also, the green she chose didn't show very well because it was too close in color value to the teal warp.

Rachel said she wanted her towel to be mostly white pattern, but I made her pick two other colors to add a little interest and to give me something to work with in developing the pattern.  She chose light orange and yellow.  It was my plan for each towel to be completely different from each other, even though they were woven on the same warp and all threaded the same.  I think this one came out very nice.  The colored yarns are all 8/2 cotton.  The white is 50/50 cottolin in a similar size to the cotton, something like 22/2.  It is too cold to go outside to the studio to look.
My DIL Jenn's towel is the orange and lime green towel on the left.  I tried to tone down the teal by weaving the tabby with brown and olive green 8/2 cotton.  The orange and lime green are both cottolin.

These towels were all pretty slow going, since it took me a long time to recover from my surgery.  As I started my chemotherapy treatments, they gave me something to focus on besides being sick.  They were quite good therapy.

This towel is for my DIL Rebecca.  She wasn't here to pick her colors, but she loves anything blue, so my daughters and I picked for her.  I used

navy, wine, ocean green and light blue.

As I was working on this towel I managed to break my hand doing something I shouldn't have been doing.  My doctor splinted it, but I could tell a few days later that it wasn't going to heal that way because every morning when I woke up, the splint was out of position and the bone was bent at the break.
I had our hand specialist at work look at it after the weekend and he set it and put in into a cast.  It was much more comfortable after getting the cast but I still wasn't supposed to use it, so weaving was put on hold for a few weeks.
 I was then put in a removable splint since it was starting to heal.  I was happy because my doctor was worried that the chemo would slow the healing.  It didn't, and I was able to start weaving again.

I was able to finish Rebecca's towel and get started on the last one needed for Christmas.  This towel was for my daughter Becky.  She chose off white, navy, red, light orange and light green. The eleven treatments I was getting for the cancer was taking a toll on me though, so I couldn't weave for very long at any one time.  I was getting a bit worried that I wouldn't finish it in time.  I had a good week when I had a week off from chemo and was able to finish it.
It is always nice to have a little warp left over to make something for myself.  My favorite color is red, so I dug through my box of yarns that I had dyed and found quite a range of pinks to reds to purples and came up with this towel.  It is my favorite.
Group photo.  I was very happy to finish all of them before Christmas.

An incidental note about this warp.  When September rolled around, I heard from a friend who also has ovarian cancer that September was ovarian cancer awareness month and their color was teal.

I am not much of one for following all the color fads for all the different "awareness" months or weeks, but I guess it does give me an opportunity to inform women that there is no screening test for ovarian cancer, and because symptoms can be kind of vague and attributed to other things, most ovarian cancers are not caught until later stages.

Here is a list of symptoms, with the first four being the most common:
1. Abdominal or pelvic pain.
2. Increased abdominal size or persistent abdominal bloating.
3. Needing to urinate often or urgently.
4. Feeling full after eating a small amount.
5. Changes in bowel habits.
6. Bleeding after menopause or in between periods.
7. Unexplained weight gain or loss.
8. Lower back pain.
9. Indigestion or nausea.
10. Excessive fatigue.
11. Pain during sex or bleeding after sex.

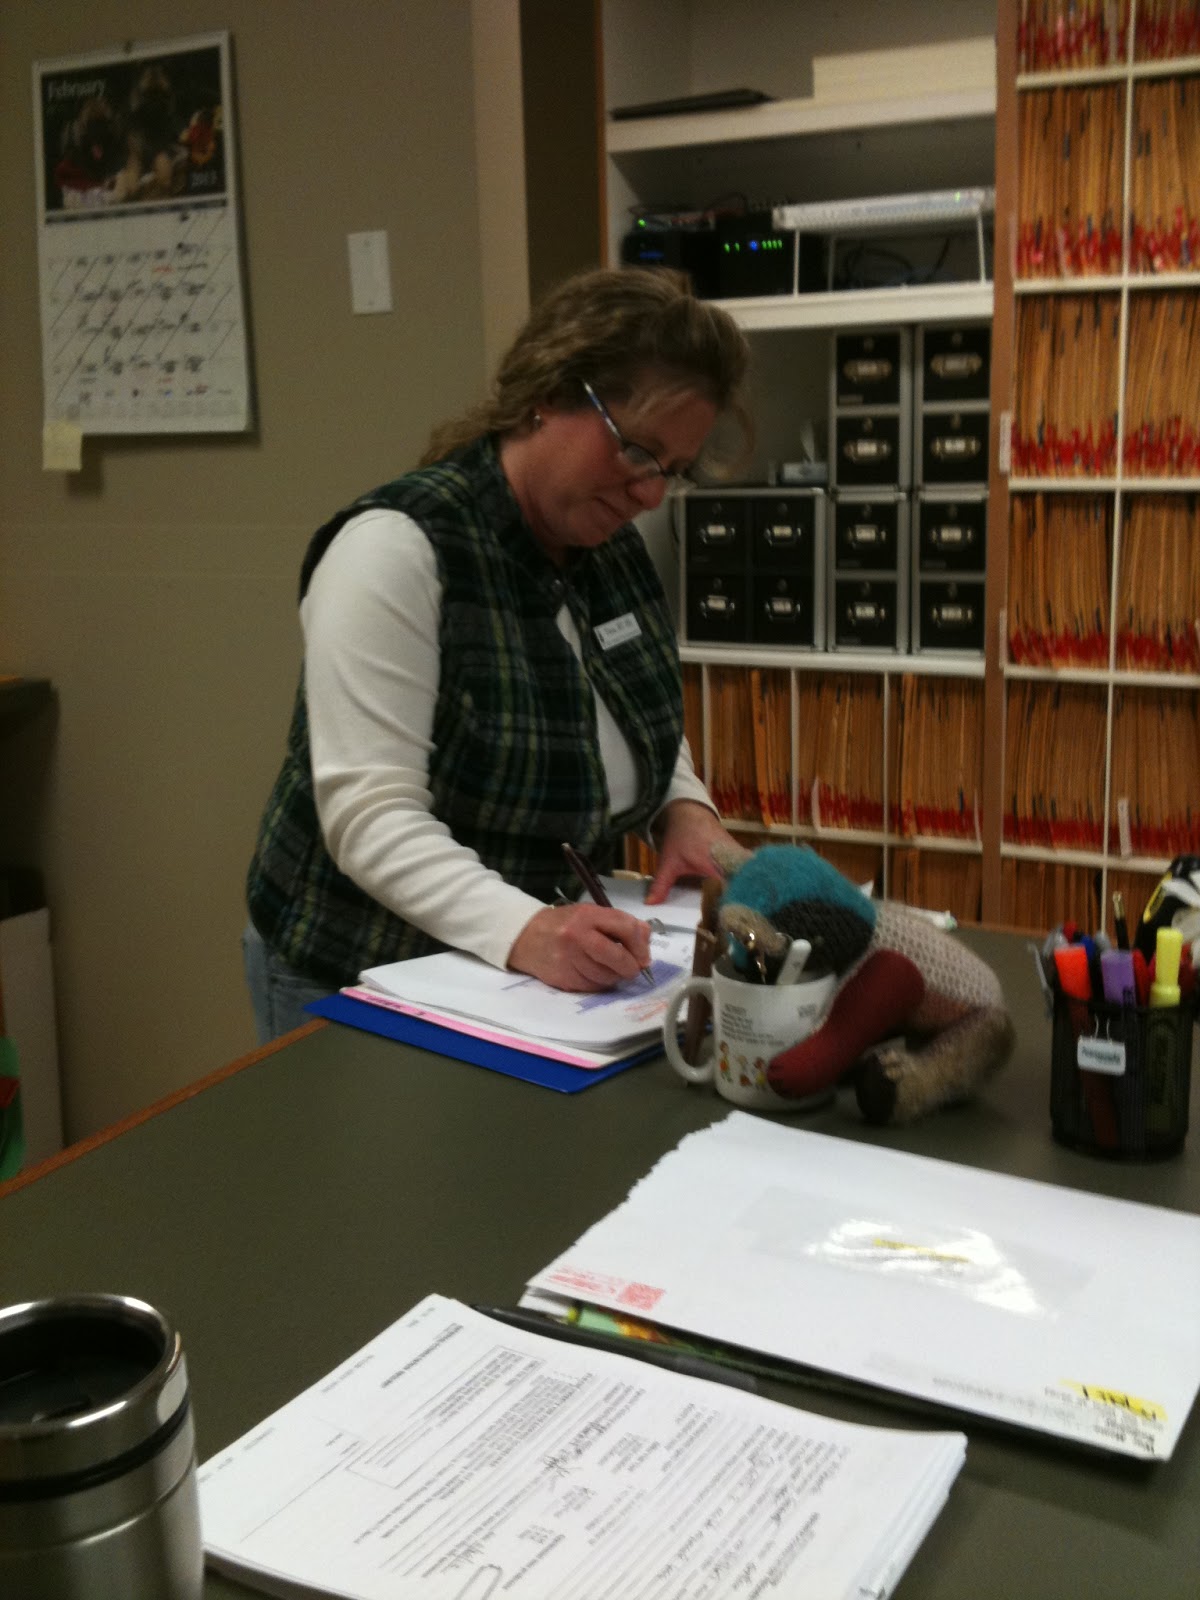
Out of the eleven symptoms, I had eight of them.  If any of these symptoms are new to you and you experience them frequently over a 2-4 week period, talk to your doctor and besides checking for other causes, ask him or her about the possibility of ovarian cancer.  My stage 3c cancer was found with a CT scan.  I was referred immediately to a gynecologic oncologist and was in surgery the next week.

I wish I had known this information months before I was diagnosed.  Hopefully this list will help someone else to seek treatment in an early stage.  Having the symptoms doesn't necessarily mean you have cancer, but checking the symptoms with your doctor could possibly save your life if it is and is caught early.

Now, I am looking forward to a better new year in 2014.

Monday, December 2, 2013

Five More Rugs Finished on Leclerc Fanny

I love finishing a warp.

This warp was a little long for me.  I start to get bored with the same colors, so I was happy to have this one finished, but I love every one of the rugs.  They are all resting on the floor for a couple days before hemming since rugs change shape after being taken off the loom.  After being stretched so tight on the loom, it takes a couple days for them to shrink down to their final size.

It is always a challenge to see what I can come up with from my fabric stash.  I make such a mess in the studio as I try and mix and match fabrics, making sure I will have enough strips to make a whole rug.  There is nothing worse than getting almost done and running out of a unique fabric before the rug is long enough.
I thought that happened with the turquoise rug, but finally found the basket with the remaining strips.

The warp made six rugs. This was the first one, finished a while ago. It used up a collection of polyester double knit from my stash.  The light color was from a bolt of very ugly gray, tan and white striped fabric. The navy and red was from my mom's stash collected years ago when women actually wore clothing from this horrible material.

When the warp wears out, the fabric strips will still be as good as new.
More polyester double knit from the same collection of my mom's.  These are all quarter-inch checked fabric.  Click on the photo to make it bigger.
 This one was fun.  I liked how the x's turned out on the white stripes.
This one also gets the x's.  The fabric came from the bargain table at Wal-mart.  It has my granddaughter Trisha's name on it since she loves anything blue.
Blues were starting to get monotonous so I changed this one and added pink and tan.  I think it is one of the prettiest ones from this group.
I am not a big fan of looper rugs but they are fast to weave.  I had a bag of fat loopers (like potholders are woven from) given to me by my friend Lou down in Arkansas.  I still haven't perfected getting nice edges and hems.  I may end up binding the ends instead of turning a hem since they are pulled in so much.  I will decide in a couple days when I start hemming all of them.
This is the draft I used, obviously repeating to add more stripes and reversing the threading for the opposite edge.  A floating selvedge would be helpful for this weave.

I will get this posted and then need to get to bed.  I have chemo again tomorrow morning and have to leave the house before 7 am.  I am so looking forward to being done.  Two more to go--tomorrow and one more next week.  Night all.


Friday, August 30, 2013

Repairing a Broken Warp Thread on the Loom

I was weaving along on my third towel on my current warp when I noticed a loose thread.  Sure enough, my nice strong warp had a broken warp thread.
Here is the culprit.  A lovable little fuzzball?  NOT!  A bit of fuzz made two of the threads stick together and one broke.  If you need to make the photo bigger, just click on it.
Here is the break by the back beam.
The first step is to isolate the broken warp and heddle.  This one happened to still be threaded.  I used my homemade warp separator, which is simple enough to make, but are available for purchase.  Google search warp separator.


Tie the broken end to the repair piece.
I am generous in cutting the repair piece, so I cut mine with enough to finish the towel I was working on plus some extra.  How much is needed depends on whether the break is in front of or behind the heddles, and how far into the piece the weaving has progressed.

You don't need enough to finish the entire remaining warp.  The object is to get back to using the original warp thread and do away with a dangling weight behind the loom.

Since I am weaving a hand towel that is only about 30" long, I will finish this towel before getting rid of the repair warp and fastening the original warp thread back onto the cloth.

Once the two ends are tied together, I pull the knot through the heddle.
Gently pull the knot through the reed.

I like the flat daisy head pins to attach the broken warp thread to the cloth.  Start the pin about 1/4" away from where the warp thread should be and bring the tip up 1/4" from that.

Wrap the repair warp around the pin 2-3 times in a figure eight and then anchor the tip of the pin in the fabric so it is not exposed to draw blood.
Sometimes photos are a good way to find errors.  As I was viewing my photos, I noticed the last orange weft thread wasn't doubled.   I was able to go back and fix that error and reset my pin.
Finally, go to the back of the loom and tie the other end of the broken warp to the repair warp.  Suspend a weight that gives the same amount of tension as the other warp threads.  An "s" hook works for me.
On a little more personal note, I have had one chemo treatment and my hair is gone.  It started falling out about nine days ago so I had a friend shave it off.  I have been working on crocheting a couple chemo hats (the white and turquoise ones) and my mom knit the pink one for me.

The weather has been pretty warm in Charlevoix, so I have become more comfortable going without a hat.  The cool weather will be coming soon though, and I am thankful for all the nice hats and caps  friends have given me.  They will all get put to good use!

I am feeling fine, my energy is almost back to normal, as is my appetite because my last chemo was over three weeks ago and it has been over six weeks since surgery.  I was supposed to get my next treatment yesterday but it was cancelled because my blood count was too low.  Hopefully it will be up enough to have the chemo next Thursday.  Right now, I am in a self-imposed semi-isolation.  I can't afford to get anyone's germs.  The up side to that is I am getting a fair amount of weaving done.  

Now, back to the loom!


Friday, August 16, 2013

A Good Day for Teaching Weaving

Our son David and his family came for a short visit last night on their way to the UP to go camping.  This morning, while everyone was getting ready to go, I had an opportunity for another teachable moment with granddaughter Morgan.  She got to help me with finishing my last rug on the Weaver's Delight.  When we ran out of fabric for the tubes, I made some more strips and she helped me prepare them into a long strip to load into the tubes.

Here she is on the pink pony, finishing loading a tube.  I think she thought it was a pretty neat tool.
After finishing that project, we heard a commotion outside and walked out to the road to see a car burning a few doors down.  Just a little bit of excitement to start the day!  I have no idea whose car it was or the cause of the fire.  We watched (from a distance) as the fire spread more and more and eventually blew out three of the tires.
 I have had my sister-in-law Mary's Leicester Dryad countermarche loom for several years.  It was the first loom for me to ever use.  She was over recently and I asked her if she was ready to learn to weave.  Since I'm home all the time now, it is easier to fit into our schedules.  After everyone left for camping, we got to business winding a warp for a rayon chenille scarf.

Mary is a great student and grasped the warping concept right away.  I was able to go about my business doing other weaving things while she wound her two bouts of warp.

After we had lunch, we brought the warp to the loom and got it wound on the the back.  Having an assistant certainly makes the warping and winding go faster.  I showed her the back to front method.  We used the lease stick holding device and a 1/2" spacing raddle to spread the warp.

That was about all I was able to do in one day.  I was happy everything went so smoothly.  On Mary's next visit, we will tackle threading and sleying the reed and running a small sample of both plain weave and twill.  I am going to try 20 ends per inch, but think it may be a little too much at least for the plain weave. After doing a little sampling, we may end up resleying the reed to spread it out a little.  I'm looking forward to having someone come weave with me.  My project is on the loom next to hers on the left side of the photo.

If you think this loom looks a little odd, you are right.  It is only good for short warps because the front and back beams are also the cloth beams.  It is not a good loom for long warps because of the thickness that builds up on the beams.  It also doesn't have a brake release, so I will be showing her how live weight tensioning will solve that problem and make the loom very easy to use.

Now I am tired and it is nap time!  All in all, a great day!


Tuesday, August 6, 2013

Making a Repair Heddle and Adding a Warp Thread

Life can change unexpectedly.  Four weeks ago today, I was diagnosed with ovarian cancer.  A week later I had major surgery to remove the masses.  After a week or two of healing and waiting for my chemo to start, I was thankful to have some weaving in the works that wasn't too heavy for me.  It is something I enjoy and can occupy my mind with something other than being sick.  I make dishtowels for all my girls every year for Christmas and I had started that project just before my diagnosis. I had part of it threaded, so was able to pick up where I left off.  I finished the threading, and then..... 

Oops!  I missed a warp thread right in the center of my warp and I discovered that fact after the whole warp was threaded through the heddles.
The loom I am using is my Leclerc Jano table loom.  It has wire heddles, so to do the repair, I need these handy diagonal cutters which are available in any hardware store.
 To get a better view, click on the picture. 

Clip the top and bottom loop on the heddle in the center.
Here is a better view without the cutter in the way.  This is just one of the extra heddles that were pushed off to the side.  Gently remove the cut heddle without unbending the wire too much.
Insert it into the proper spot on the heddle frame.  Tighten the wire loop a bit so it won't slip off.

Prepare a warp thread a bit longer than the other warps and thread it through the repair heddle from the back and incorporate it into the bundle of warp threads where it belongs.

Since everything was threaded, I tied my warp threads on to my front rod at this point.
When everything is tensioned correctly, I take the added warp thread in the back, and wind it around my fingers to take up most of the length.  Wrap some of the warp around the loops, fold it in half and insert an S hook into the to loops.

The warp thread dangles off the back of the loom.
The hook might be enough weight but if not, add fender washers until the right tension is achieved.  It should be the same as the adjacent threads.  If it is too tight, you will notice it when you start to weave because it will pull at the fell line.
 This is a handy little gadget used to spread the warp threads if any break while weaving or if you discover a threading error when you start weaving, or if like me, you miss a warp thread.
Insert it where the error is to hold the adjacent threads out of the way.  I made this today in about 30 minutes with a cedar shim, a utility knife and some sandpaper.  If you prefer to buy one, search for a warp spreader.  I have seen several that are made with nice hardwood.

If I happen to break a warp thread while doing these towels, I will do another post about that type of repair.


Thursday, July 11, 2013

Gypsy Rose, the Second Left-Over Bear

Gypsy Rose was finished at the same time I finished Hamish, but because she was a gift, I didn't write about her right away, and then I got sick and didn't have the energy or desire to write.  I decided today, that I can't wait any longer.  She needs her story told.
As many of the other bears were, she was finished on a trip to visit Bob's parents.  I think she has the sweetest face of all the bears, and just calls out for cuddling.

Hamish is on the left and Gypsy Rose is on the right.
Fortunately, some of the bears live close by, so she got to meet Othar and Benjamin one day when Davey and Bobby brought their bears over to my house.
In February,  it was "Take Your Bear to Work Day" at Bay Street Orthopaedics, so I decided to take this bear.  My co-worker Tina helped come up with the name Gypsy Rose.  She is helping Tina with some of her work.  It's a good thing that was just temporary information, because Gypsy got hold of Tina's pen and scribbled all over the paper.
Gypsy Rose is being a little Nosy Parker here, sniffing at one of her favorite foods in the cup.  Tina ended up sharing her oatmeal with her, since it would have been rude to eat in front of a baby bear!

I decided when I started making the last two bears that one would be for my daughter-in-law Jenn's birthday. The trouble was that Jenn's birthday was quite a while after Gypsy Rose was finished.  I started feeling bad that she was the only bear left to be adopted.  One day in April, Jenn called me and said she was in Traverse City, so I quickly wrapped the present and headed to Jenn's mom's house where they were having a ladies family gathering.
Jenn had seen a few photos of Gypsy Rose and was hoping she was going to be for her.  She was surprised and a little teary-eyed when she opened the early birthday gift.
I am so happy Gypsy Rose got to go to a home where she will be loved, and will get to live with four of the Griswold bears.  Hopefully they will all have some wonderful adventures.
Deb, Jenn's mom, also fell in love that night with Hamish.  I let him come along with me so he could see who was going to be Gypsy Rose's mom.
I don't think it is possible to be too old to love a Teddy bear.  I am thankful that all of Griswolds and Left-Overs have such wonderful new homes and mommies and daddies.

These will probably be the last bears.  Maybe their moms and dads will write about more of their adventures.

Friday, July 5, 2013

Weaver's Delight "Pink Pony" Stuffing Machine and Rigby Cutter

I finally got motivated to get back to my blog today.  I was given a "pink pony" stuffing machine by our friend Lou down in Missouri when Bob and I were on vacation in April.  I haven't been feeling well since then, so have only been doing dibs and dabs with weaving lately.  I finally took enough photos to show how I prepare denim strips and load them in the tubes for weaving.

Preparing denim jeans for rugs is labor intensive.  They are plentiful at the resale shops and from friends, so I don't make any effort to open seams, remove pockets, or take out hems.  I trim around all those areas and then make one fairly straight edge on one side.
I purchased a strip cutter on eBay because my hand can't take the heavy cutting for any length of time with the rotary cutter any more.  This particular cutter is a Rigby Cutter.  It is pretty old, but it has been working pretty well for me.  I would have preferred a Fraser Cutter, since there are more options for parts.  They cost more than I was able to spend though.
The red cutter is adjusted away from the cutter blade for the strip width I want.  I use strips that are about 3/4" - 7/8" wide for a twill weave rug.  I would probably cut them 1/2" for plain weave rug.  Anything wider than that and it is almost impossible to get the strips tightly packed. 
Turn the crank and it cuts the strip.
When I get enough strips cut with various colors, I take a bundle of them and sit with them on my lap and cut a 45 degree angle at each end.  I usually do all one end, then flip them around and do the other end.  The angle must be in the same direction at both ends.

Here is a bundle that is probably enough to stuff 2-3 tubes for the shuttles.
I overlap them about 1/4" and triple-stitch zig-zag the ends together.
The strips feed through the shuttle better this way, and I have fewer hang-ups then if I use a 45 degree seam.
I sew them in a continuous strip until it is hard to sew any more.  They loop around in front of the machine and eventually there isn't any more space to sew.

I clip my threads when I'm done sewing and pull them out from under the presser foot.  They will curl into a spiral and that needs to be straightened out before running the strip through the stuffing machine.
The fabric strip is threaded through the eyelet guide in front of the left concave roller, then brought over the top of the roller and drops into the funnel below.  The convex roller is brought forward against the fabric strip. 
As seen in this photo, I straightened my strip into a container on the floor.  While turning the large wheel with the leather belt, the pole is used to poke the strip down into the tube and pack it tight.
Here is a tube loaded into a shuttle.
This rug is getting close to being complete.  Three more tubes will probably be enough. 

I am using a twill tape to keep track of the rug length and the temple that came with the loom to help keep a consistent width to the rug.